


MDMA QTest (Advanced)

$34.95
Know Your Dose! The percent purity of MDMA can vary tremendously. So can the amount of MDMA in a pressed ecstasy tablet. With our MDMA test kit, you can quickly and easily determine the percent purity of your molly, or how many milligrams of MDMA are in your tablet. This Advanced kit also contains two extra tests to identify counterfeit samples. (If you already know that you have MDMA, you don’t need this kit. You can buy our less expensive Basic MDMA QTest instead.)
- Results in 12 minutes.
- Works with powders, crystals and pressed pills.
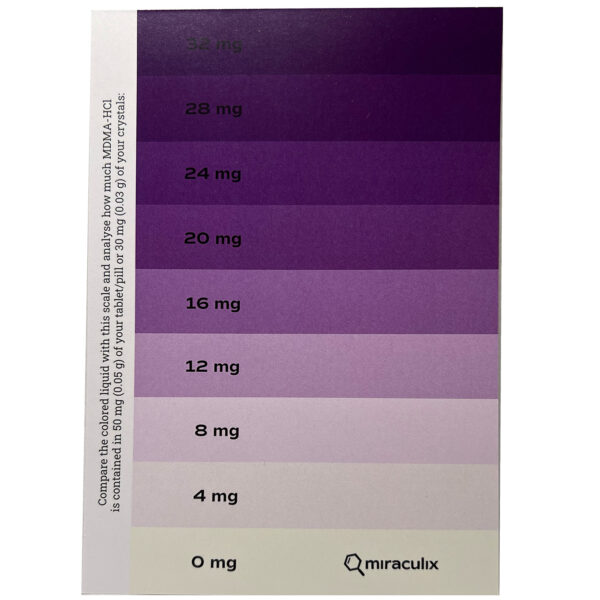
- Easy evaluation with the enclosed color chart.
- The only quantitative MDMA test kit on the market.
Automatic Bulk Discounts
Get 20% off when you buy five or more QTests.
- Description
- Instructions
- FAQ
Description
Know your dose with the MDMA QTest
The MDMA QTest is the first and only quantitative MDMA test kit on the market for ecstasy and molly.
This single-use kit can tell you the percent purity of MDMA powder or crystals, or how many milligrams of MDMA are in a pressed ecstasy tablet.
Use only a small amount, then compare the color of the detection vial with the enclosed color chart.
It’s that simple.
Rule out Counterfeit Pills
As our advanced MDMA kit, it also comes with two smaller, confirmation tests. Together they can detect counterfeit samples containing amphetamine, methamphetamine, caffeine, MDA (or MDA-MDMA combinations), PMA, PMMA or 2C-B.
Note: If you already know for sure that you have MDMA, you do not need the advanced kit to determine the potency. You can buy our less expensive Basic MDMA QTest.
Instructions
Instructions
Note: A paper version of these instructions comes with your order.
IMPORTANT INFORMATION! – READ THIS FIRST
• Use this kit at room temperature. (If stored in a refrigerator, let it warm up for one hour first.)
• Perform the test on a flat surface during the daytime.
• Evaluate the result in daylight immediately after the 12-minute development time. (The color can change if you wait too long.)
• Use a white, letter-sized sheet of paper as a background when evaluating the color. (See section four for evaluation details.)
• This kit should only be used on pills, powders and crystals. It does not work on liquids.
• Read all the instructions at least once through before beginning the test.
1. BACKGROUND INFORMATION
This test kit can be used to detect the active ingredient MDMA and its concentration in powders, crystals and pills, including pressed tablets of any color. In addition, it can detect counterfeit samples that contain amphetamine, methamphetamine, caffeine, PMA, PMMA or 2C-B.
2. PREPARING FOR THE TEST
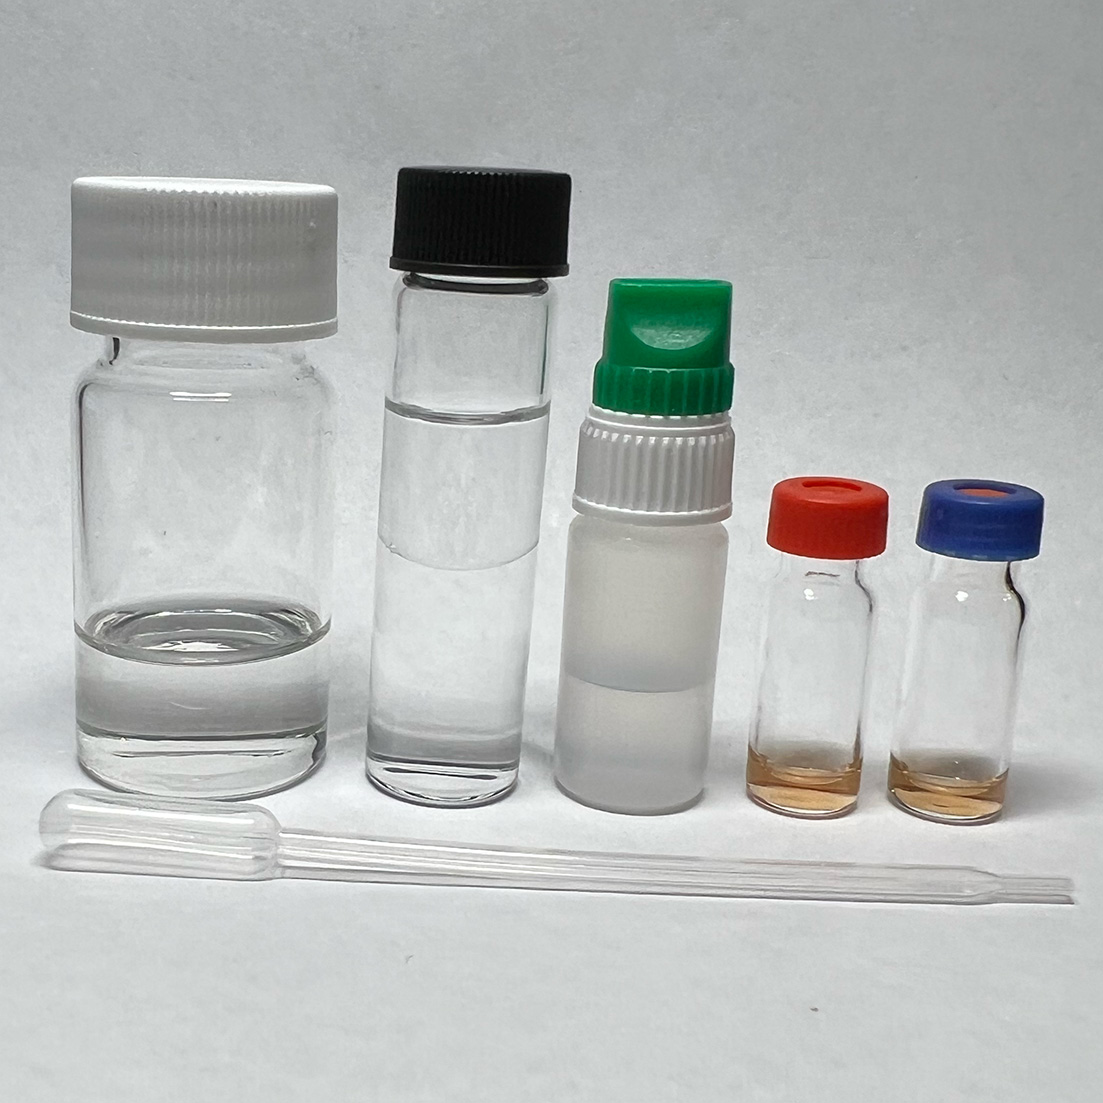
Take out all the items from your kit. Along with these instructions, you should have:
• protective gloves
• thin glass vial with black lid (extraction vial)
• large glass vial with white lid (detection vial)
• small glass vial containing orange liquid with red lid (negative confirmation vial)
• small glass vial containing orange liquid with blue lid (positive confirmation vial)
• plastic dropper bottle with green lid
• pipette
• evaluation color chart
You will also need a milligram scale and either a small funnel or a creased piece of paper to carefully pour the measured powder or crystals into the extraction vial. (You can make your own paper funnel. Google it!)
3. PERFORMING THE TEST
3.1 First put on the enclosed nitrile gloves and wear appropriate protective clothing and safety glasses. If you wear contact lenses, remove them. The liquids in the vials contain acids which may cause skin irritation or severe eye damage. In the event you come in contact with the liquid, remove the affected clothing immediately and rinse the affected skin area with water for several minutes. In case of eye contact, rinse the affected eye with running water for several minutes. Perform the test either outdoors or in a well-ventilated area and avoid inhaling the fumes, which can cause dizziness. (Keep pets, especially cats, away from the testing area.)

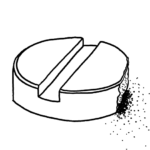
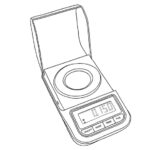
3.2 Using a milligram scale, carefully weigh out 30 mg of powder or crystals. If you are testing a pressed ecstasy tablet, use 50 mg. You can either scrape off 50 mg from the edge of the tablet using a sharp knife, or even better, crush and mix the entire tablet and then weigh out 50 mg of the resulting powder.
IMPORTANT! – If you are testing a pressed ecstasy tablet, weigh the entire tablet first and write down the result. You will need to know the total weight of the tablet in order to calculate how much MDMA it contains after testing 50 mg.
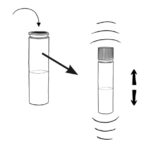
3.3 Insert the extraction vial (with the black lid) into the leftmost hole in the provided cardboard box insert. This secures the vial in an upright position so it doesn’t accidentally fall over. Next, open the lid and use a funnel or creased piece of paper to carefully pour in the 30 mg of powder or crystals (or 50 mg if testing a pressed tablet). Put the lid back on the vial and close it tightly. Remove the vial from the insert hole and shake it for approximately one minute until all the soluble components have dissolved, then put it back into the hole and wait a few minutes for the insoluble components to settle to the bottom. Meanwhile, open the three remaining glass vials and place them into their corresponding holes in the cardboard box insert.
IMPORTANT! – Don’t confuse the small glass vials after removing the colored lids. We suggest putting the small vial with the blue lid (the positive confirmation vial) on the far right, and the vial with the red lid (the negative confirmation vial) just to the left of one with the red lid.
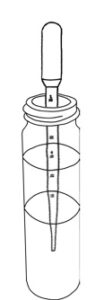
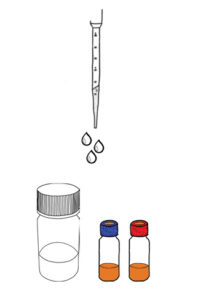
3.4 Open the extraction vial again, gently remove it from the hole and look at it carefully. You will notice two distinct sections of liquid, one floating above the other. Using the pipette, you are going to collect liquid from the lower section. First, squeeze the top of the pipette to create a vacuum, then insert it into the vial until the bottom tip of the pipette is in the middle of the lower section of liquid. Now release pressure on the pipette and liquid will be drawn up into it. Be careful not to pick up any deposits or crumbs from the very bottom of the vial. Remove the pipette from the vial.
3.5 Drop two drops from the pipette back into the extraction vial to clear any debris that might have collected in the tip. Then, holding the pipette vertically (straight up and down), add three drops of liquid into each of the three glass vials (the large detection vial and the two confirmation vials). There should be plenty of liquid in the pipette to complete this step, but if it looks like you are going to run out of liquid, get some more by repeating step 3.4 above.
Return any leftover liquid inside the pipette back into the extraction vial and put the pipette somewhere safe and out of the way. Then tightly close the lid again. Put the white lid back onto the large detection vial and shake it several times to mix the ingredients. The color change will begin happening soon and will take 12 minutes to complete. Set a timer.
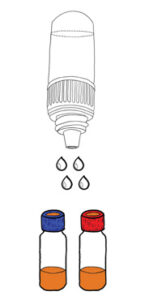
3.6 While waiting for the color change to finish, open the plastic dropper bottle with the green lid and add 12 drops of the liquid to each of the two small glass vials. Close the vials tightly with the correct colored lids and invert each two or three times to mix the ingredients.
3.7 After waiting 12 minutes, remove the three glass vials from the cardboard holes to observe the color changes. See the next section, “EVALUATING THE RESULT,” for details.
4. EVALUATING THE RESULT
Follow the instructions above and wait 12 minutes before evaluating the result. For the large detection vial, evaluate the result immediately after 12 minutes.
4.1 HOW TO EVALUATE THE LARGE DETECTION VIAL
If there is no color change: If the liquid in the large detection vial has not changed color at all, that means there is no detectable MDMA (or MDA) in your sample. However, other unknown substances may be present.
If the color changes, but it’s not purple: This means your sample is not pure MDMA and it might not contain MDMA at all (or MDA). Use the back-side of the color chart (step 1) to see some things that it might contain. For example, green indicates 2C-B. Yellow/orange indicates amphetamines. Other shades could indicate other drugs or mixtures of drugs.
If the color changes purple: This indicates the presence of MDMA, MDA or both. You can tell which is the case by evaluating the two small confirmation vials. Do that first (section 4.2 below), then come back to finish the rest of this section (section 4.1).
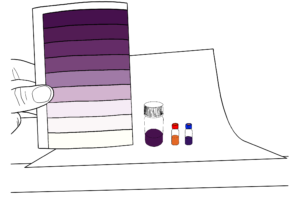
After confirming that your sample contains MDMA (section 4.2 below), you can determine the concentration of MDMA by comparing the intensity of the purple color in the large detection vial with the enclosed color chart. Follow the instructions below.
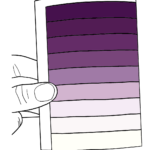
• Use a white, letter-sized sheet of paper as a background.
• In daylight or under bright light, hold the glass vial next to the color chart about six to eight inches in front of the white sheet of paper and look through the glass vial head on. For best results, your eyes should be fairly close to the vial, but no closer than about six to eight inches.
• Now compare the color of the liquid in the vial to the color chart. The color bars on the chart correspond to the amount of MDMA that was in the sample you tested.
• If you tested 30 mg of powder or crystal and the color matches the 16 mg color bar, you know that your sample is approximately 50% pure (i.e., it contains 16 mg of MDMA for every 30 mg of powder/crystal.)
• If you tested 50 mg from an ecstasy tablet, divide the total weight of the tablet by 50 and then multiply by the result. This will tell you how many milligrams of MDMA were in the original tablet. For example, if your tablet weighed 460 mg, and the result shows 16 mg of MDMA in the 50 mg portion that you tested, you know there was approximately 147.2 mg of MDMA in the original tablet (460 ÷ 50 = 9.2 and 9.2 x 16 = 147.2).
4.2 HOW TO EVALUATE THE SMALL CONFIRMATION VIALS
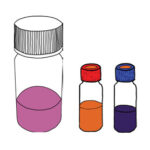
If the large detection vial turned purple, that means your sample contains either MDMA, MDA or both. Evaluate the small vials to determine which is the case. Follow these instructions. (You can also use the back side of the color chart.)
• If the vial with the red lid (the negative confirmation vial) turns red, that strongly indicates the presence of MDA. If it stays the original orange color, that indicates no MDA is in the sample.
• If the vial with the blue lid (the positive confirmation vial) turns a strong purple/blue, that indicates the presence of MDMA. If it does not change color or turns slightly pink (and if the vial with the red lid turned red) that confirms the presence of MDA.
• If the vial with the red lid turns slightly reddish and the vial with the blue lid turns purple, that indicates the presence of both MDMA and MDA.
4.3 EXPECTED RESULTS
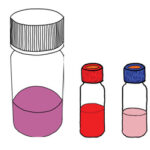
If the large vial shows a clear purple color, the vial with the red lid remains the original orange color, and the vial with the blue lid shows a clear purple/blue color change (like the image above), this indicates MDMA is present, and the substance is probably not contaminated with amphetamines, MDA or PMA. In this case, go back up to step 4.1 and assess the concentration of MDMA in your sample. (Note: there is always the possibility that small amounts of any substance could be present, just not enough to affect the coloration.)
4.4 UNEXPECTED RESULTS
If the large vial turns purple, the vial with the red lid turns red, and the vial with the blue lid shows no color change (or turns slightly pink), the sample contains MDA rather than MDMA. It might also contain other substances. If both small vials show a color change, this indicates a mixture of MDA and MDMA. Either way, it is no longer possible to determine the concentration.
Other unexpected results can also occur. Here are some possibilities and what they likely indicate:
1. If the large vial turns green and the small vial with the red lid turns red, this strongly indicates the presence of 2C-B.
2. If the large vial turns yellow/orange and the small vial with the red lid turns red, this strongly indicates the presence of amphetamines. In this case, if the small vial with the blue lid turns purple/blue, this indicates the presence of either caffeine or methamphetamine.
3. If the large vial does not change color and the small vial with the red lid turns red, this strongly suggests the presence of PMA. But if the small vial with the blue lid turns blue, then it suggests PMMA rather than PMA.
4. If you see a mixture of different colors, this indicates the presence of one or more unknown drugs. Even if none of the vials change color, the sample still could contain unknown substances.
5. STORAGE AND SHELF LIFE
Store the reagents in the refrigerator (35° – 46° F) and out of direct sunlight for a shelf life of at least 6 months.
6. WARNINGS
• Keep the kit away from children and animals.
• When performing the test, wear suitable protective gloves, clothing and face/eye protection. If you wear contact lenses, remove them before using the test kit.
• Perform the test outdoors or in a well-ventilated area and avoid inhaling the fumes, which can cause dizziness.
• The liquids contained in the test kit consist of various acids which may cause a corrosive/irritating effect on the skin or severe eye damage/irritation. Avoid contact with the skin, eyes, mouth or clothing.
• Should contact with the above listed areas occur, remove the relevant clothing immediately. Instantly rinse the affected skin areas with water for several minutes. In case of contact with the eyes, immediately rinse them with water for several minutes using both hands to keep the upper and lower eyelids open.
• Substances processed with the test kit are not to be consumed!
7. DISCLAIMERS
• QTests are only to be used for the detection and quantification of unknown substances.
• The result may not be 100% accurate. Your sample could be adulterated with one or more unknown substances that cross-react with the reagents, affecting the quantitative result.
• The result does not mean your sample is safe to consume. It could still contain unwanted substances and impurities that can be harmful or even deadly.
• The MDMA QTest is not a substitute for laboratory analysis.
• miraculix and/or Qtests.org assume no responsibility for the use or misuse of the test kit or the results.
8. DISPOSAL OF MATERIALS
Check your local regulations for proper disposal of acids.
FAQ
Coming soon